Three Ways to Be More Profitable Making Hay
by Linda Geist, University of Missouri Extension
Haymaking grew in popularity in the 1970s with the introduction of the large round baler. Large bales improved efficiency and reduced the labor required to handle and store small square bales.
But just because producers can make more hay, it doesn’t mean they should, he says.
Skyrocketing equipment costs are forcing producers to take a harder look at haymaking economics. Machinery prices have far outpaced calf sale prices. Since the 1970s, the cost of a baler has increased tenfold, while calf prices have only increased a little more than fivefold. A producer must have an understanding of this inflation issue and how to better leverage equipment in order to have a profitable haying enterprise.
To manage this, a producer has several options: 1. Reduce equipment to match the acreage; 2. Spread equipment costs across higher yields; 3. Spread equipment costs across more acres. The second option has the greatest potential at increasing profitability, if the cost of increasing yield isn’t too high.
Fifty years ago, a 500-pound calf sold for about $71 per hundredweight, and a new round baler cost roughly $5,000, enough to support 14 calves per baler. Today, producers average 29 calves and a baler that costs around $58,000.
The typical cow-calf producer in Missouri manages 45 to 60 cows and makes hay on about 75 acres. In high-yield years, producers may spend around $60 per bale. In low-yield years, that cost can climb to $120 per bale due to fixed costs and overheads.
While haymaking is steeped in tradition and gives producers a sense of control over feed inventory, it is an expensive enterprise. Roberts encourages producers to consider the economics of selling equipment and transitioning hayfields into grazing opportunities.
Producer attitudes have also shifted over the past five decades. In the past, many producers focused on making as much hay as possible, regardless of quality. “This is not always the best strategy,” Roberts says.
Early first cuttings contain fewer coarse stems and mature seedheads. They are typically leafier and more digestible, with significantly higher protein content than later cuttings. For producers who continue to make hay, Roberts suggests improving profitability by managing in-field traffic. Feeding hay back onto hayfields when the ground is frozen allows nutrients to return to the soil. He also recommends rotating fields through a grazegraze-hay system.
Ultimately, haymaking requires careful management of machinery costs to remain profitable. Roberts urges producers to sell excess or unused equipment and match machinery size to acreage. Moving away from haymaking can be uncomfortable, he says, especially for those who value the tradition and sense of control it provides. However, purchasing hay can also offer control over the quality fed to the herd.
“You can control the quality of the hay you purchase,” Roberts says. “But you cannot always control the quality of the hay you make.”
When and How to Implant Calves on Cow-Calf Operations
by Andrea Bedford, Bovine Veterinarian
Implants remain one of the highest-return technologies available to cow-calf producers when timing and technique align. Most implant failures are not product failures; they stem from calves being implanted at the wrong time, placed incorrectly or handled without enough attention to cleanliness and restraint. Success depends on getting both the “when” and the “how” right.
Why Timing and Technique Belong Together
“Implants will not replace good management,” says Lauren Younker, feedlot production consultant with TELUS Agriculture during a webinar with the Beef Cattle Research Council. “Healthy and less-stressed calves are going to respond the most to an implant.”
Implants work by amplifying existing growth potential. That means calves must be healthy, minimally stressed, and on an adequate plane of nutrition. Proper timing ensures the implant’s payout window matches biological opportunity and marketing goals, while correct placement ensures the hormone actually does what it is designed to do. Miss either piece, and much of the expected benefit disappears.
When to Implant: Matching Biology to the Calendar
For most cow-calf operations, branding or early pasture turnout (roughly 45 to 60 days of age) remains the most reliable window for implanting suckling calves. At this stage, calves are healthy, stress is often already part of routine processing, and the implant’s payout aligns well with the grazing season.
Implanting too early offers little benefit. Calves at that stage are still physiologically adjusting, and implants require sufficient nutrient intake to generate a measurable response.
“For the first couple weeks [of life], they’re just getting used to being alive. That implant would probably not be doing much,” Younker says, advising against placing implants at newborn processing. “The older they are, that 45-day range, they’re starting to nibble on grass. You’re going to see more value there.”
Implanting later — including grass turnout at 120 to 150 days of age — is still worthwhile, particularly when earlier processing opportunities were missed. While some early gain potential is lost, implants can still improve feed efficiency and lean growth during the remainder of the grazing period. The key adjustment at later ages is selecting an implant appropriate for calf size and nutritional plane.
Reimplanting at weaning is an area in which the research is less clear. Younker suggests considering whether you will be keeping these animals as replacements. “Some research suggests when we are implanting heifers at wearing, we can delay that first cycle and the first calving,” Younker says. “You can consider not implanting any of your heifers at weaning if you pick your replacements later, or you sort your replacements off at weaning and implant the rest to capture that value when you sell them later on.”
Common Implant Types and When to Use Them
Implants vary widely in potency and payout length, but at the cow-calf level, success depends more on matching the implant to the production phase than selecting the most aggressive option.
Suckling-calf implants (low-to-moderate potency)
When to use:
• Branding or early pasture turnout (typically 45 to 60 days of age)
• Calves grazing pasture with moderate energy intake
Why they fit:
• Improve average daily gain and feed efficiency
• Appropriate for both steers and heifers during the suckling phase
• Commonly used as a single implant when calves will be sold at weaning
Grower/grasser/stocker implants (moderate potency)
When to use:
• Programs where calves will be kept beyond weaning but not immediately finished
Why they fit:
• Payout periods align with extended grazing or backgrounding
• Useful when reimplanting retained calves
• Better matched to increasing nutrient intake
Longer-duration grower implants
When to use:
• Retained ownership where calves cannot be easily rehandled
• Grazing or backgrounding programs with limited processing opportunities
Why they fit:
• Extended payout reduces the need for reimplanting
• Helps align hormone release with longer marketing timeline
High-potency finishing implants
When to use:
• Feedlot or high-energy rations
• Retained ownership calves transitioning toward finishing
Why they fit:
• Most effective when paired with high-energy diets
• Generally not appropriate for typical cow-calf pasture system
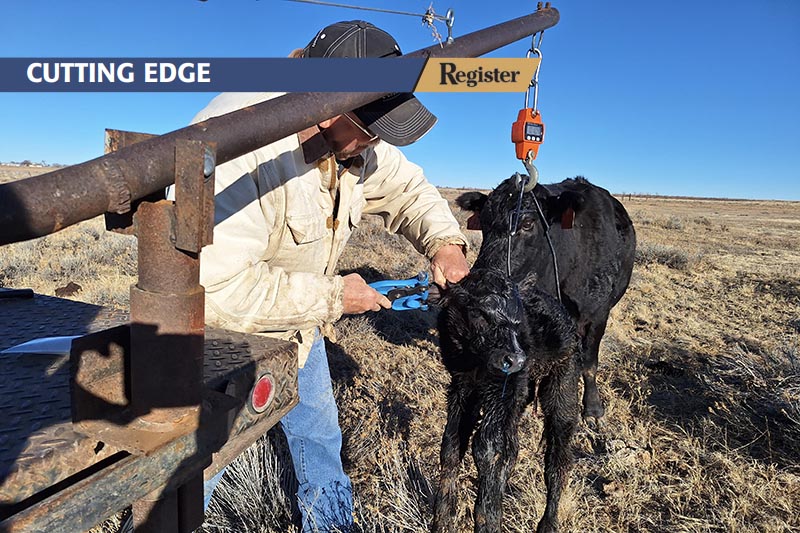
How to Implant Correctly
Even well-timed implants fail if placement is poor. Attention to technique protects both animal welfare and economic return. Equipment matters. Bent, burred, or dull needles increase tissue trauma and pellet damage. Replacing needles frequently is inexpensive and prevents avoidable failures.
Cleanliness is non-negotiable. Dirty ears and nondisinfected needles are among the most common causes of implant abscesses. If an abscess forms, hormone payout is compromised and performance gains are lost. Consistent use of disinfectant solutions and cleaning visibly dirty ears is critical, especially in wet or muddy conditions.
Restraint improves results. Proper head restraint stabilizes the ear, improves placement accuracy, and reduces tearing or cartilage penetration.
Most importantly, be proactive if something doesn’t seem right. “If something goes wrong, redo it,” Younker says. “Implants are relatively cheap to the value they provide; they’re worth getting right.”
Implant Placement That Works
The preferred site is the middle third of the ear, between the skin and cartilage, away from tags, scars, and ridges. Pellets should lie in a straight line and be palpable under the skin without bunching.
“We want to have a lot of blood flow and no scar tissue around where that implant is,” Younker says. “This will take practice. It’s a very learnable skill, but it will take you a few calves to get comfortable.”
Common placement failures include: Pellets deposited into cartilage, crushed or bunched pellets, implants exiting through the ear, and excessive swelling weeks after processing.
When placement errors occur, removing the pellets and reimplanting immediately is preferable to leaving a non-functional implant in place.
Put It Into Practice
Veterinarians and producers should work collaboratively to capture implant value consistently. That includes aligning implant timing with herd goals, recommending appropriate products for each production phase, and reinforcing proper technique during processing.
This guidance often extends to specific situations producers ask about:
• Replacement heifers: Suckling-calf implants used before four months of age have not been shown to impair future reproduction. Post-weaning implants warrant greater caution.
• Dry years or marginal pasture: Implants still provide benefit and may be more valuable when nutrients are limited.
• Retained ownership or show calves: Implant choice should reflect ration intensity and days on feed rather than age alone.